
Camp Overview
Set up camps for your gym by navigating to Enrollments > Camp Session. Once there, you will click the blue +Camp button in the top right corner to begin.
Setting Up a Camp Session
The pop-up window in the screenshot below will appear after clicking the add camp button. You will configure your settings for the entire camp session rather than just one week of camp in this window. If you have new camps running each week for the entire summer or an entire month, each new camp will be housed under this one session.
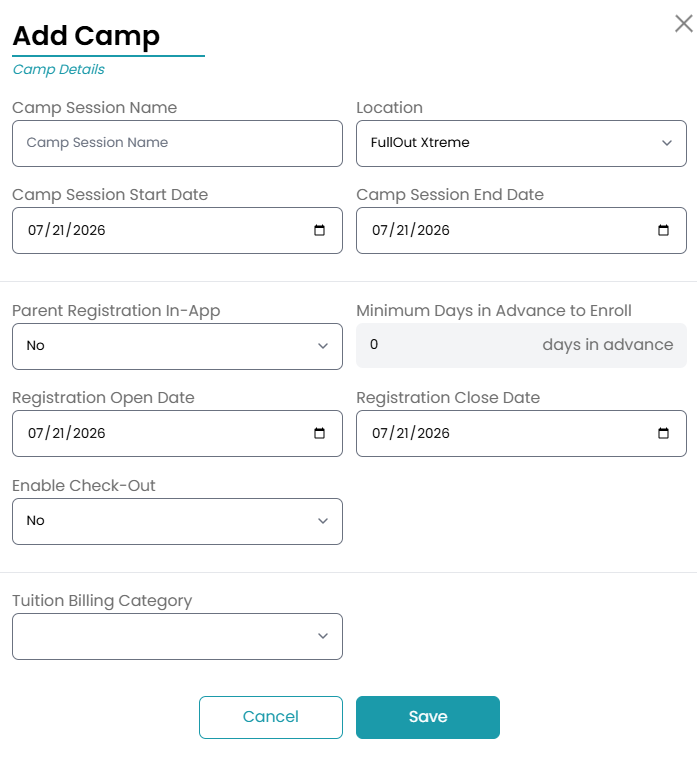
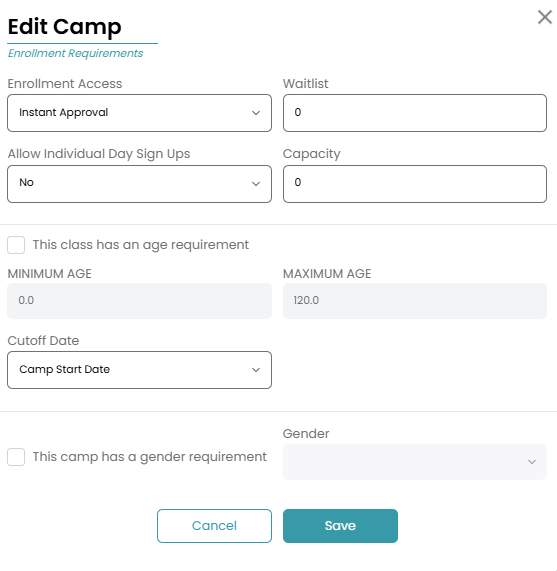
Once you've entered the settings and clicked Save, a second pop-up window will appear allowing you to set up your enrollment requirements for this camp session. These enrollment requirements will apply to all camps housed under this session.
The final step to setting up your camp session is to set your tuition requirements and schedule. The tuition you set here will be the tuition that parents will pay if they do a drop in. You can set half day AM, half day PM, and full day prices depending on if you allow drop ins. You can also set up your post date for your camp invoices as well as discounts for campers. Learn more about camp billing here.
You will also need to set your schedule from this page including start and end times for a full day, half day AM, and half day PM.
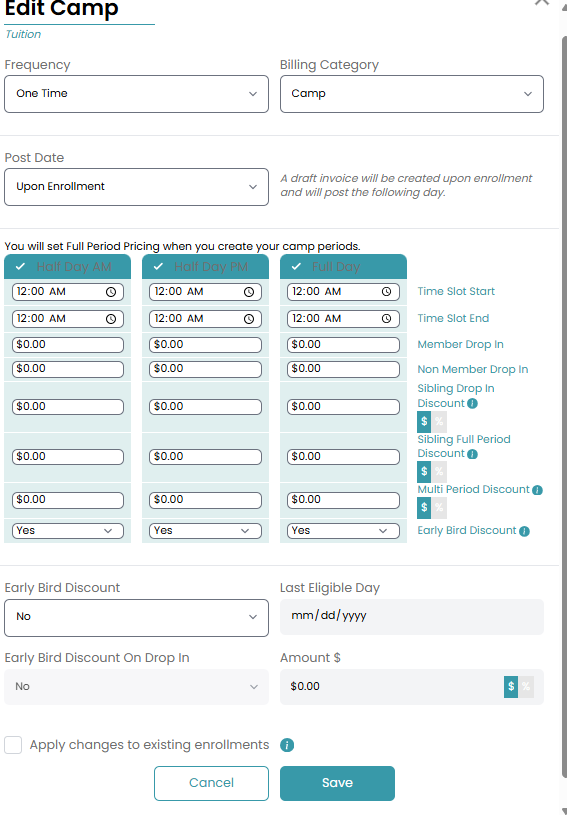
NOTE: You do not need to set your prices in this modal if you are not allowing drop ins. The only thing required in this section is your schedule. You will also set up your individual camp prices once you start adding camps.
Adding Camps
Once you've finalized your camp session, you can begin adding classes using the green + button under the Camp Schedule section. A pop-window will appear for you to fill out the name and dates of the camp as well as the price for that specific camp.
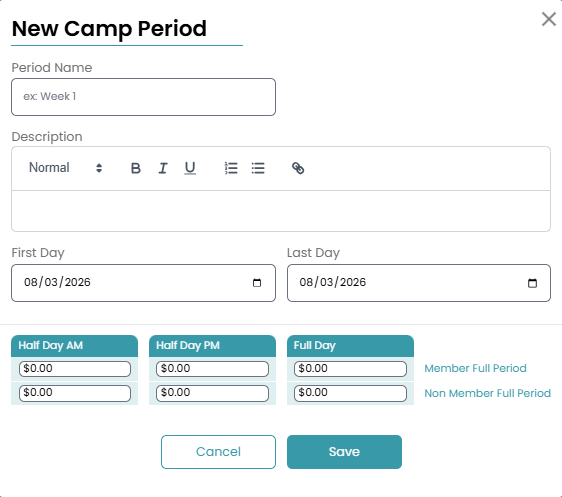
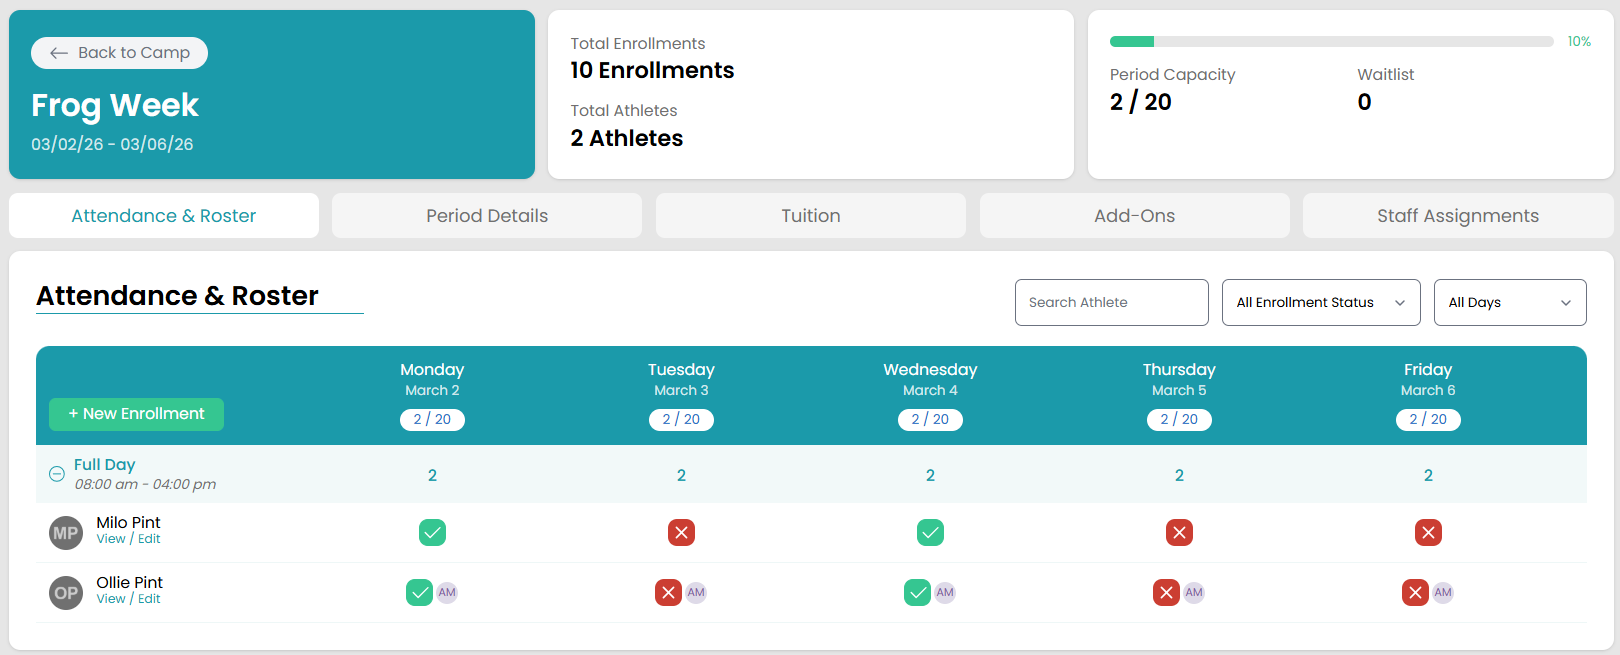
One you've added all of your camps, you can click into each one to update the tuition, camp details, or attach add-ons such as t-shirts or boxed lunches.
Interested in adding Extended Care to your camps? Check out this support article!